We understand that not all of you are aware of all the powerful tools you have access to on your busk.co dashboard. So, here’s how you can customise your account to make the most of it.
Let’s get started!
Once you log in to your busk.co account and click the settings icon located at the top right-hand side of your screen, you will be taken to your dashboard.
If you’re logging in from your mobile, click on the hamburger button (the three bold horizontal lines resembling a hamburger) located at the top right corner of your screen, and then on ‘settings’.
Change your URL, receive cashless tips and check your payments
The first tab in your dashboard is the ‘TIPS’ tab. The first thing you’ll see here is your profile URL. This is the unique URL assigned to your profile. If you upgrade to a PRO account, you’ll have the option to choose your own URL (e.g. by changing it from busk.co/48555 to busk.co/camila). This personalised touch will make you look a little more professional when you share your profile.
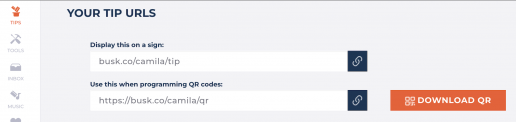
Next up, we have your “tip URLs”. This section provides you with two valuable URLs—The first one is the one you would display on a sign. It allows people to easily access your busk.co profile. The second URL enables you to create your very own QR code, which can be scanned to take people directly to your tipping page. It’s a convenient way to encourage cashless tips from your audience.
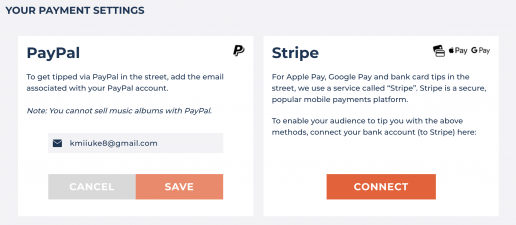
Moving along, you will find ‘Your Payment Settings’ showing your connected PayPal and Stripe accounts, which enable you to receive cashless tips. If you don’t know how to link your Stripe account, we have a detailed blog post that will guide you through the process here.
Additionally, you will be able to change your default currency and select the average amount you want your audience to tip you.
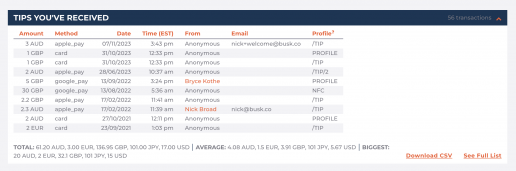
Last, we have your payments. Here you’ll find information about the tips you’ve received, as well as the tips you’ve made. Additionally, you’ll have access to details about your music purchases.
Edit your personal information
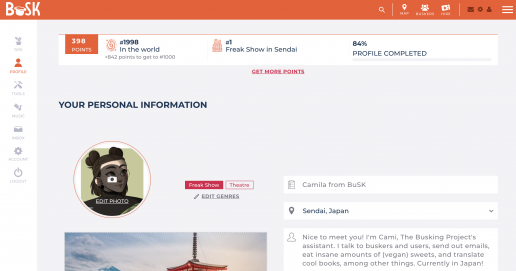
In the ‘PROFILE’ tab you’ll find ‘Your Personal Information‘, where you can edit your profile photo, genres, name, and location, and write a short biography so that fans and clients know more about you and your show.
As you scroll down, you’ll see the ‘Your Gallery’ and ‘Your Social Media Links’ sections, where you can add photos and videos of your journey as a busker to your profile, as well as links to your website, Facebook, Vimeo, Tik Tok, YouTube and Instagram. This will be especially useful if you want to grab the attention of gig organizers or apply to festivals.
If you keep scrolling, you will find your ‘Event Settings’, where you can lock or unlock the option to be considered for events. This means that we can hand-pick you for certain events, and event organisers can also get in touch with you if they want to hire you. By default, this is turned on. If you switch it off, you will no longer have a “HIRE ME” button on your profile.

Under ‘Your events bio’ you can write an additional bio to highlight why event organisers should choose to hire you. Additionally, under ‘Your fee’, you can specify the minimum and maximum amount you charge per gig. You have the choice to display this information on your profile if you want.
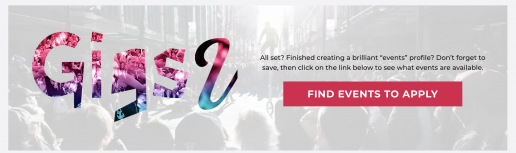
Once you have completed your profile, you can ‘Find events to apply‘ by clicking on the button at the bottom of the page. This will redirect you to the events page, which displays all the available events.
Points banner and our algorithm
You may have noticed that as you add more information to your profile, the number of points displayed in the banner at the top of your ‘PROFILE’ tab starts to change.
This banner shows your total points, your worldwide and local ranking, and the percentage of your profile that’s been completed. If you click on ‘Get more points,’ you’ll discover various actions you can take to earn additional points.

You may be wondering, what exactly are the points for?
Well, similar to other social media platforms, The Busking Project uses an algorithm to organise the almost 13000 buskers on our website. Our algorithm is a simple points system that determines how high you will show up in searches throughout the site.
We do this so that the ‘best’ and ‘most active’ profiles are displayed first, meaning they are easier to find by clients looking to hire performers for events.
You get points by creating a compelling profile, adding your events information, using our tools, getting a good fanbase, and upgrading to a PRO account. We’ll guide you through all of these actions in a later section of this blog post. If you want to learn about our algorithm in more detail, you can check out this blog post.
Find busking resources
Within the ‘TOOLS’ tab, there are two sections.
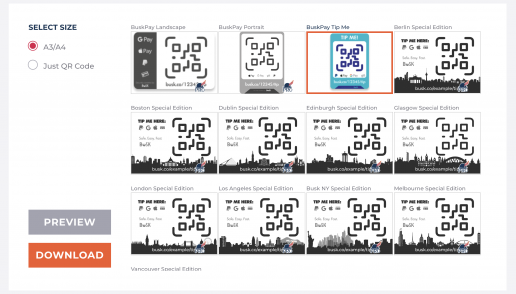
The first one is ‘Signs’, where you’ll have the option to either download or buy a sign, which will allow you to receive cashless tips in the street in a fast and easy way.
With a standard account, you’ll have access to the ‘Tip me!’ standard sign. By upgrading to a Pro account, you unlock additional options—you will be able to download both landscape and portrait signs, as well as special editions specific to certain cities. These signs can be printed out on A3/A4 paper and laminated.
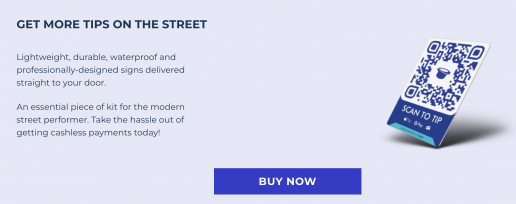
If you’re interested in purchasing one of our BuskPay signs, simply scroll down and click the “Buy Now” button, or go to busk.co/buskpay. These signs are compact, lightweight, recyclable, waterproof and highly durable. Also, they don’t need batteries or charging, and they work all over the world!
The second section is ‘Resources’. With a standard account, you’ll have access to a variety of helpful resources including suggestions for hat lines, tips and tricks on how to improve your busking, informative blog posts on cashless payments, busker-themed artwork, and a list of organisations worldwide that directly or indirectly support street performers.
By upgrading to a Pro account, you unlock additional resources, including our amazing and super comprehensive list of over 600 festivals all over the world that you can apply to. It also includes extra goodies like music of street performers and an iBook that explores the topic of street performance from a global perspective.
Upload your music for sale
In the ‘MUSIC’ tab you can upload albums, which people will be able to purchase from your profile and download to their phones and computers.

To upload an album, simply click on the “Create Album” button. Please keep in mind that you you’ll need a connected Stripe account to create and publish an album. Additionally, with a standard account, you’ll be able to upload a maximum of 3 albums, but if you upgrade to a PRO account, you can publish up to 5 albums.
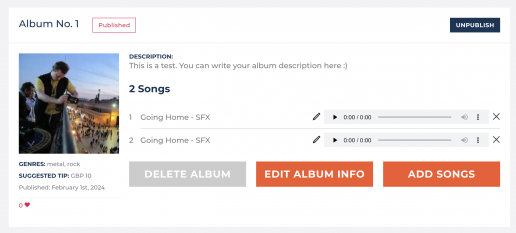
When it comes to music sales, the revenue will be split as follows: 90% for the street performer, while the remaining 10% will be divided between The Busking Project and the cashless payment provider (Stripe, PayPal, etc.). You have the freedom to set the suggested tip for your music at your own discretion.
Within this tab, you can also access all the albums you’ve purchased from other buskers. It’s a fantastic opportunity to discover and support the incredible music created by fellow artists!
Chat with fans and other buskers
Within the ‘INBOX’ tab, you will find all the ongoing conversations you have with other people. To chat with your fans and other street performers, simply click on the ‘Message me’ button located on their busk.co profile.
You can see who has become your fan, and even send a message to all of them with just one click. You can also see all the buskers you follow, and by clicking on their profiles, explore their photos and videos.
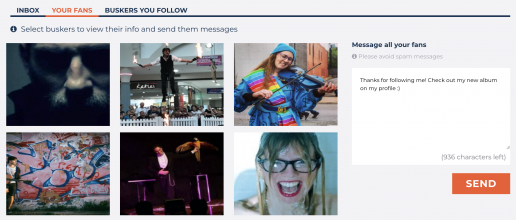
Make the most of the ‘INBOX’ tab to engage with your supporters, nurture your fanbase, and expand your reach within the busking community. Remember that every person who becomes a fan adds to the number of points you have on busk.co, which boosts your visibility on our site!
⚠️ While interacting with others, please maintain your conversations respectful, and do not use this service to spam people.
Manage your account
The last tab, ‘ACCOUNT’ will help you update your account’s general information and deactivate or delete it.
Under the ‘General’ section you will be able to update your email and phone number and change your password. ‘Email notifications’ allows you to choose which emails you’d like to get from us. If you’re interested in upgrading your account from standard to PRO, you can do so in ‘PRO Account Settings’. You can read more about the benefits of upgrading your account here.
Lastly, from time to time, we receive questions from buskers who want us to remove their account, but you can easily do so in this section.
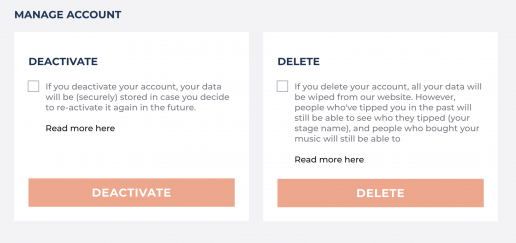
If you want to deactivate your account, meaning that your data will remain securely stored on our servers in case you decide to return, simply check the ‘Deactivate’ option on the left, type the word ‘deactivate’ and click on the orange button.
On the other hand, if you prefer to completely close your account and have your data permanently deleted from our servers, select the ‘Delete’ option on the right, enter the word ‘delete’, and click on the orange button. That’s it!
Final thoughts
As you can see, there are many things you can do from your dashboard, all of which were created with the goal of helping you increase visibility and safely earn cashless tips. So, take a moment to log in, explore, and discover the various features of our website.
If you have any doubts or questions about any of these features, don’t hesitate to let us know!